
Making your Manicure Last!
Everyone deserves a little splurge on themselves from time to time. Living in Florida (12 months of sandal weather) for me, it tends to be a pedicure and in rare circumstances, a manicure. But with manicures in my town running between eight and twelve dollars, it’s really disappointing when they chip and get ugly within one or two days. Here are ways that I have discovered that help make my manicure last a little longer, therefore getting more bang for your buck. Most of these will work for your pedi as well.
1) As in the case of basically everything I do, first, I try to find a deal. Whether it’s a loyalty card (some salons have a buy 5 or 10, get the next one free), a grand opening sale (I’ve gotten a free manicure with a pedicure), or a coupon, this is always step one on my list of anything I do!
2) File and buff before you go. I know. That’s what you’re paying for. I’m not saying to take time away from your couponing to make a perfect square or oval of each fingernail. Just give them a general once over to shape them the way you want them. Buffing them makes them stay shiny once you take the nail polish off. Plus, this gives your manicurist more time for the hand and arm massage-the really good stuff!
3) Wash your hands and scrub, scrub, scrub. When your manicurist asks you to wash your hands, scrub your fingernails with the nail brush. This helps to make your nails look healthier and also exfoliates away the dead skin around your nail beds.
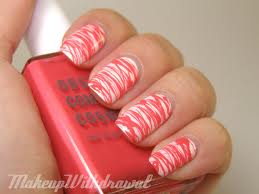
4) Pick a neutral color. Picking a bright polish color or a French manicure shows the chips and imperfections more easily and more quickly than using a neutral or clear color. When you’re picking a color, think like you would when you’re shopping for make-up. Pick one that goes with your skin tone and is going to look nice both up close and from a distance. Also, just as you would with make-up, try it out on one or two fingernails to ensure a good match.
5) Use your own color. This isn’t to say to bring your nail polish to the salon (although this is usually acceptable, as well-call your local nail salon to make sure), but use a color close to one that you own. If you do choose to bring your own color, invest in a high quality polish, if possible a brand that your salon carries. They should be more likely to use it if it’s something they’re familiar with and a higher quality polish will look nicer and last longer. This way, if you get a small chip within the first few hours, you can touch it up easily.
6) Don’t be afraid to stop back in! If you get a major chip or mess of a fingernail, go back in and ask them to touch it up. I have done this on several occasions. They will, in my experience, touch it up for free within the first few hours. If it’s within one or two days, usually it’s a fee per fingernail that you need repolished. At the salons I go to, it’s usually between one and three dollars.
7) Once it starts to chip, let it go! A tiny imperfection, leave the polish on. Once you start getting significant chipping, take the nail polish off completely. Having chips and imperfections draws others attention to your ruined manicure.
8) Do it yourself! I know, not everyone has the time, inclination or finances to go out for manicures every week. However, there are a myriad of nail products from super inexpensive (I found those nail polish stickers by Kiss at the Dollar Tree-not the best quality, but could do the job in a pinch) to high quality nail polish to do-it-yourself gel manicure kits. Doing it yourself, you’ll put more money out initially, but you’ll save in the long run by not having to go to the nail salon. Maybe you can even do them for your friends for a little side cash!


Recent Comments